4 Networking Tips You Must Know

networking tips for small business personalized print sales and marketingWhether you are looking for a way to connect with new customers or you’re hoping to have a good conversation with other professionals, a networking event could be a great way to create those new connections. However, these events are what you make them, and creating a quality connection is as much about your skills at networking as it is about the event. Here are four networking tips you must know.

1. Listen When You Join A Conversation—And Show That You’ve Been Listening
When you’re approaching a group of people already engaged in conversation, take some time to listen. Not only will this allow you to have a good understanding of what the group is talking about, but it will also give you a chance to figure out if the conversation is relevant to your interests.

And, when you do join in yourself, acknowledge a point that has been made rather than refocusing the conversation on yourself. Not only will this ensure that you enter the conversation smoothly, but it will ensure that you maintain a friendly tone.

2. Don’t Focus on What You Want—Focus on What You Can Offer
You’re going to the networking event for a reason—usually to make new business connections and possibly make a sale—but don’t let that reason keep you from having a good conversation! Focus on what your customer is saying and how you can speak to the challenges they are facing in their business.

And speaking of that focus…

3. Polish Up Your Elevator Pitch
We’ve talked about elevator pitches before, and a networking event is tailor-made for these one-to-two-sentence summaries of your business. And you can tailor your pitch according to the event. If you’re going to a networking event for social reasons, keep your pitch focused on who you are as a print professional. If you are going to the event to connect with prospective customers, keep the pitch focused on what your business can do for them.

4. Find a Reason to Follow Up
If you’ve established a rapport with someone, keep that relationship going! Once you’ve got their contact information, be sure to reconnect within a week of meeting them. Whether it’s sending an article relevant to the topic you discussed or giving them a call to discuss their product needs, finding a practical reason to follow up can help keep the conversation going.

How do you make the most out of your networking efforts? We’d love to see your suggestions in the comments below.

Want Proof That Your Enhanced Finishes Design is Perfect? Order One!

We understand that when you place an order for one of our new enhanced finishes products you want it to be perfect. Because of this, we’re offering you the option to place an order for a single announcement, business card, or postcard to proof your design! This allows you to check a printed proof of the design for a small fee before committing to your order, and it allows you to adjust the design as needed for a small additional fee for each proof.

How it Works
These proofs can be placed as a manual order or online orders—simply place your order with a quantity of one! Proofs cannot be ordered alongside any other products, but you can order press proofs of multiple Enhanced Finishes print pieces in one order. Once you’ve ordered, we’ll print it for you and send it via 2nd day air so that the proof is in your hands quickly.

The Next Step if You Ordered Online

Like what you see? Your file’s ready to go! If you placed your order online, go to the My Account page, click on Reorders (online orders only) and select your order of one via order conformation, PO number or customer information and click Start Reorder. Once you’re there, select Edit next to Product Specifications, and update the quantity.

Once you’ve taken a look at the proof, you might want to adjust your file. To order, go to the My Account page, click on Reorders (online orders only) and locate your order and click Start Reorder. Once you have located the order, click Edit next to Front Artwork to upload the new artwork and order a single-quantity proof of this new version.

The Next Step if You Ordered Through the Catalog

As with online proofs, once you have examined the proof you can contact us to order a higher quantity of the proofed item or adjust your file and create another proof. If you would like more guidance when creating another proof of your artwork—or if you want additional guidance before you start—contact your customer service team to learn more.

Ready to get started? Take a look at the updated digital copy of our catalog or visit the Enhanced Finishes page on Navitor.com to place your order.

Labels Play A Critical Role The Healthcare Industry—No Second Opinion Needed!

Thoughts of hospital and medical supplies might conjure up images of a healthy amount of bandages, swabs, and tongue depressors, as well as linen storage with an unending supply of unflattering hospital gowns. But it takes much, much more than cotton balls and ill-fitting gowns to make a medical care facility run well. Along with all the medications, monitors, medical devices and paperwork, labels play an integral role in the smooth and safe operation of a hospital, clinic, or other healthcare facility. Before you request a second opinion on that, let’s take a look at some of the ways labels are put to work in the healthcare setting.

Patient identification and charting labels immediately pop to mind when discussing medical labels. These play a vital role in safety and organization. Whether affixed to conventional paper charts, applied to lab orders, or adhered to patient wristbands, patient ID labels provide clear, concise information that is easy to read and won’t fall victim to spills or daily wear and tear.

Prescription alerts and allergy notification labels are just as important in the healthcare setting, and can be found on charts, wristbands, and prescription bottles. Thermal or direct transfer stocks facilitate easy printing of patient information on site. These labels work wonders at keeping things moving in an efficient and quick manner. Emergency rooms are no place for ink cartridge crises!

Equipment identification labels assure that medical equipment can be returned to the proper department, and can also document proof that each device is serviced regularly. Operating instructions or caution labels affixed to hospital beds, IV pumps, and other machinery and medical equipment ensure proper usage and minimize the risk of accidents or injury.

For younger patients, what would a trip to the doctor or hospital be without some fun stickers? Sticker sheets are a phenomenal way to keep little ones’ imaginations engaged while in an unfamiliar environment that might be a bit scary. Medical-themed sticker sheets can even serve as a helpful tool to introduce children to some basic concepts of the healthcare world. Dressing up teddy in a lab coat and stethoscope can help allay some fears or anxiety children may be experiencing. These sticker sets also transition beautifully to promotional or community event giveaways, as they can be customized with the name and address of healthcare facilities. Parades, blood drives and health fairs are the perfect spots to hand out some fun healthcare-themed stickers sporting logos and branding – high interest, yet low sugar!

Other popular uses include:

  • Hospital visitor passes
  • Tamper-evident stickers for lab specimens
  • Lab communication labels (Refrigerate, STAT, Serum, etc.)
  • IV labels
  • Maintenance inspection record labels
  • “Sterile” labels
  • Allergy notifications
  • Prescription bottle instructions or warnings
  • “I Got My Flu Shot!” stickers

Additional options that are vital in hospitals and clinics include:

  • Thermal or Direct Transfer Stocks: Print patient information on site
  • Tamper Evident Stocks: Crucial for prescriptions and medications
  • Barcoding & Consecutive Numbering: A must-have for equipment and patient identification
  • Durable Stocks and Finishes: Perfect for abrasive and harsh environments, bleach and industrial medical cleaners won’t damage these hard-working stocks and finishes!

Medical and healthcare industry labels improve the internal processes of healthcare facilities and enhance the care and experience of patients. Whether it’s a fire engine red warning sticker on equipment or medicines, or a smiling teddy bear sticker, hospitals, clinics, and nursing homes are home to many, many labels and stickers. Trust Label Works to meet the needs of your clients and customers. Contact our customer service department today at 800.522.3558 or customercare@labelworks.com to learn more about our medical and healthcare label options.

Looking for a sample back of medical and healthcare labels? Look no further. We’ve compiled a sample pack your customers can touch and feel and features popular label applications. Simply click here!

Or personalize your own sales flyer geared towards the healthcare and medical market here.

They’re Here: NEW Enhanced Finishes!

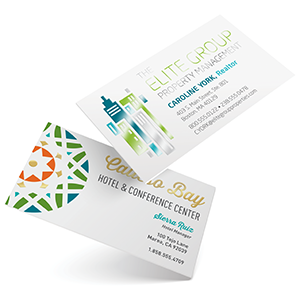
raised foil, spot uv gloss, raised spot uv gloss for postcards, business cards and announcementsAre your customers looking for a way to add polish to their business cards to make a more memorable first impression? Do they want to make their announcements for an upcoming event extra-special? Do they want the postcard for their next mailing to be truly showstopping?

We’ve got the products for you.

Navitor has debuted three new print processes: raised foil, raised spot gloss, and spot gloss. These processes are a striking addition to a wide variety of print projects. Here’s what you need to know.

Raised Foil: Nine Colors to Choose From

Raised foil creates the look of foil with the tactile appeal of a raised surface, and we’re excited to debut this new print process with a wide selection of foil colors! If your customer is looking for a classic look, take a look at gold and silver raised foil; these are classic metallic colors that are a great fit for brands looking for polished, professional appeal. They can also consider dull gold and dull silver for a similar look with more muted shine.

But their options don’t end there. Your customer can get creative with light blue, red, green, or black at the same price point as classic gold and silver options. And if your customer is looking for a trendy way to capture attention, holographic raised foil is available at a slightly higher price.

Spot Gloss: Just Where You Want It

Does your customer want to add emphasis to the most important parts of their design? They should consider spot gloss. Spot gloss, also called spot UV, allows them to apply a glossy coating in selected areas. They can use it to highlight their logo, the most important text on their print piece, part of an image, and more.

You can also achieve a more subtle look by using spot gloss as a design element in areas where there is no print or in areas where you have used a flood coat to apply a single color. This will create a surprising pop of shine from certain angles, making it a great way to add an unexpected design element or to create a pattern with flair.

And if your customer wants to add dimension to their spot gloss print…

Raised Spot Gloss: Bringing Gloss to New Heights
Love the look of spot gloss but want the tactile appeal of a raised surface? Raised spot gloss is here to deliver! You can use raised spot gloss similarly to spot gloss, but in addition to the pop of shine it will create a raised surface for even more emphasis.

Want to Know More?
If you’re looking for more information, we have a variety of different options for you! Click here to explore the products available, or download a flyer to help you introduce these new print processes to your customers. If you want to learn more about how to create the designs for these print pieces, click here for the detailed instructions you will need to create your Enhanced Finishes press files.

Are you excited about these new print processes? We’d love to see you join in the conversation in the comments below.
Summer is Coming! Here’s Your Chance to Save

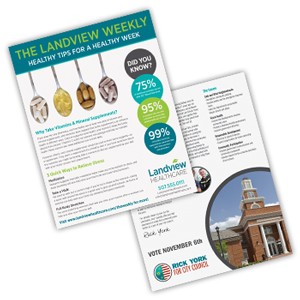
Your customers have a lot of events to prepare for now that warm weather is finally here. They might be hosting sidewalk sales to bring more foot traffic into their store. They might be preparing to host a booth at the commercial building of a fair or sponsor an upcoming community event. They might want to replenish their supply of business essentials. They might have new products that they need to inform customers about.

And you’ve got the print pieces they need to make that happen.

Not only is this the perfect time to reach out to your customers about their summer print needs, but it’s also a great time to save!

Reaching Out Early for Summer Events
If your customer has events coming up, it’s a good idea to reach out early so that they can place an order for the print they need. Not only will this help ensure that you have the opportunity to save on your order—more on that in a moment—but it will also ensure that your customer’s order is in hand early and ready to go whenever their event arrives.

Want to Save?
To celebrate summer, we are offering 50% off any form of shipping for custom stationery items. Simply include coupon code CPN-50SH9 with catalog orders or visit Navitor.com to save automatically on all these products:

This offer excludes promotional products and holiday and greeting cards.

What print pieces do your customers look for as summer approaches? We’d love to see you join the conversation in the comments below.

Getting Organized For Spring? 3 Things to Learn From the Planner Trend

One of the biggest trends I’ve seen since the beginning of the year is planners and bullet journals. While the planner trend is largely geared toward keeping people organized in their personal lives, this trend could also teach you a lot about staying organized in your work. Whether you keep your notes on a calendar, keep a printed checklist, have a favorite app on your phone or are hoping to take the first step in getting organized, here are three things the planner trend can teach you about keeping your work day on track.

1) Monthly, Weekly, or Daily Formats: Choose What Works For You
Whether you’re jumping into a bullet journal or just trying to keep your to-do lists on track, one of the biggest things to take from the planner trend is that you should choose the format that works best to keep you organized. Whether you want to plan on a monthly calendar so you can see longer-range plans at a glance or you prefer to plan your schedule day-by-day or even project-by-project, personalizing your plans according to your needs helps ensure that you stay on track.

When you’re working on getting organized, this might take some trial and error. You might want to make yourself a daily checklist and pin it up next to your calendar, for example. You might want to divide a notebook page in half with one side for meetings and another for important tasks. You might even keep your list on an app on your phone or on your computer. Whatever you choose, give it a week or so before deciding if it’s the right method for you.

2) Keep Your To-Do Lists and Meetings in One Place
Keeping your plans on one page is a helpful way to ensure that you don’t miss anything, and that can be a big help in your work day. Whether you keep everything in one binder like planner aficionados or simply have a designated space on your desk for your to-do list, by keeping all your daily tasks together you will be able to avoid double-booking yourself or scheduling too much in a day when you have a long sales meeting with an important customer.

And speaking of things to keep in one place…

3) Keep Notes On Hand—And Date Them!
Don’t be afraid to keep your notes in the same place as your schedule. This can make it easier for you to find your notes and it can make it easier to look back on how a project has progressed. It’s also important to date your notes so that you can reference when a note was taken—after all, it’s important to know which notes are the most up-to-date.

How do you stay organized? Do you keep a planner for your work day, or do you use another method? Join the conversation in the comments below.

The Secret to Great Customer Service: Empathy

What is the one skill that everybody in customer support must have? Whether you’ve been on the phone with a customer service representative or work in customer service yourself, empathy should be high on your list!

Empathy is putting yourself in others’ shoes and seeing a problem from their point of view, and in customer service it’s a helpful way to keep customer service interactions positive.  Empathy doesn’t mean that you have to totally agree with your customer, but being understanding of their stress and listening can make the difference between a customer service failure and a customer service success.

First and Foremost, Listen Carefully and Repeat What You’re Hearing in Your Own Words
One of the biggest reasons that customers want to have an empathetic customer service interaction is that they want to be understood. Listening and paraphrasing what you’ve heard can help them feel heard and can help ensure that you create a solution that actually addresses their need.

While you’re listening, pay close attention to the things that they aren’t saying, too. Details like tone and body language can help tell you what emotions are at play in the interaction. Mentioning those emotions—saying “I understand this is stressful for you,” for example—can also do a lot to show that you have heard and understood the way that the customer’s need has impacted them.

Stay Respectful
It’s easy for things to get heated when your customers are upset or under stress, but it’s essential to keep in mind how you would like to be treated if you had a similar customer concern. Stay as calm as you are able and express respect for your customers to keep them feeling important. You might even find that this respect helps diffuse the situation.

Make Customers a Part of the Solution
Does it sound like your customer is stressed because they aren’t in control? Make sure that they are able to play a part in the solution. For example, giving your customer two to three options to choose from can help them feel like they have an active role in the solution.

Finish By Showing That You Care
Studies have shown that people judge an experience based on the intense moments at its end. While you might not always be able to get them exactly the solution they were hoping for, you can always show that you care and help them walk away with a positive feeling about the experience. If their concern is still an issue, make sure to reiterate that you understand how they are impacted by that concern. If there’s a clear next step, remind them of it before you finish the conversation.

Is empathy a central part of how you approach a customer service interaction? How do you put empathy to work in your business? We’d love to see you join the conversation in the comments below.

Which Envelope is Right For Your Customer?

When your customer is creating a mailing, the envelope it’s sent in will be the recipient’s first impression—they want it to be perfect! That means not only creating the right design but choosing the right envelope for the job. So, which envelope is the right one for your customer?

How Much Polish Does Their Mailing Need?
Finding an envelope to match the feeling of your customer’s mailing is essential. Stationery envelopes are designed to accompany letterhead, and come in stocks to match. They are good for communications that need an additional bit of professional polish, like official company letters or letters to important clients.

Business envelopes, on the other hand are a good option for everyday use in mailing invoices, account statements, and other informational pieces.

And if your customer is looking for a way to send catalogs and other oversized documents, mailing envelopes create a similar look to business envelopes but are made in larger sizes to suit those oversized contents.

Big or Small?
When your customer is sending a large mailing or an informational piece, they might want to consider the size of that mailing piece. Smaller pieces like brochures or rack cards are a perfect fit for business envelopes. Even better than the perfect fit, a branded envelope is a great way to add a bit more professional polish to the mailing piece and another chance to incorporate the logo for an added boost to brand recognition.

However, if your customers aren’t familiar with envelope sizes, you might want to review the options with your customer: #6 ¾ (3 5/8”x 6 ½”), #9 (3 7/8”x8 7/8”) and #10 (4 1/8”x 9½”). Our stationery envelopes come standard in the #10 size.

On the other hand, big documents like catalogs or booklets could do with a larger envelope, and we offer those, too! Choose from 6”x9”, 9”x12”, or 10”x13” to create a mailing envelope sized for your customer’s document.

What Seal Do They Want?
Your customer might not give much thought to their envelope seal options, but they are also an important thing to consider. When they are looking at business envelopes, standard gum flap envelopes are probably most familiar to your customers, using an adhesive that must be moistened before sealing the envelope.

However, standard gum flap envelopes might not be a good choice for customers who are going to be sending many pieces of mail in a short period of time. Peel and seal envelopes use an adhesive strip with a peel-off cover, while flip and seal envelopes require a quick press to seal. Both of these are good options for larger mailings as a result.

How do you determine which envelopes are right for your customers? We’d love to see your recommendations in the comments below.

Three Simple Tips for Designing a Better Form

When your customer comes to you for a form, they have a lot of options to choose from. This is especially true if they are ordering a custom form where their form can truly be a canvas for anything they want to print. With so many options, you might be called on to help your customer create a custom form, and designing a form for them is a great opportunity for you to help them create an even more effective form. Here are our tips for designing a better form.

1. Make it Clear What Information Your Customer Needs
Your customer’s form is, first and foremost, a practical piece of print. It’s the essential information for a client’s order, the receipt for a catered event, a record of services provided, or some other important documentation. That’s why it’s important to make it very clear what information the reader needs to provide. Use simple words like “name” or “zip code” and use readable fonts.

And, when you’re creating a custom form, it’s also important that you don’t include information that doesn’t need to be there. After all, why make space for information that you don’t really need? Not only will unused information make the form look cluttered, it can make it more difficult for the person filling out the form to navigate. Streamlining the form can help make it even more clear how the form should be filled out.

2. Avoid All Caps
Including text in all caps creates a very uniform look, but it makes forms much harder to read! This means that the forms will be much harder to fill out, and that will make them take longer to fill out and to process.

3. Embrace Personalization
Your customer has worked hard on their brand, and if you’re creating a custom form for them you should highlight that brand! Not only does this give them a chance for better brand recognition among their clients, but it gives them a new promotional opportunity with every form. They can highlight their logo, include full color photographs of new products, and more.

Do you design custom forms for your customer? How do you ensure that they are effective? We’d love to see your suggestions in the comments below.

3 Reasons to Check Out NSP’s Architectural Signage Catalog

What’s new from Navitor Specialty Products (NSP)? We just released our architectural signage catalog featuring a variety of different signage options including new sign audit and installation services to support specialty signage projects and help make growing your signage business a breeze. Here are just three reasons to check out this new catalog.

Get Inspired
The first section of the catalog is dedicated to inspiration, showing off what your customers can do with the signage included in the catalog. This is a great way to highlight the effect that different signage options can create in a finished space. We show a photograph to highlight the look of the space and then break down the different sign options used so that your customer can take that inspiration directly into the ordering process.

Make the Process Simple
We know that, for your customers, transforming the space can be intimidating even on a good day. For 2019, we have added options for new services including sign audits and sign installation. This takes the fear out of the process of signage ordering for those customers that need it.

We’ve also included information to help guide you and your customers through the process of ensuring that signage is ADA-compliant. Not only does this signage make their facilities more accessible for individuals with disabilities, but it can also reflect their brand as beautifully as other signage.

And speaking of their signage options…

Choose From a Wide Selection of Products
NSP offers a wide variety of different products in this catalog, allowing your customers to choose from indoor and outdoor signage as well as signage tailor-made for special events. With a wide variety of stocks to choose from and many stylish shapes available, your customer can create signage that brings their brand style to every part of their facilities.